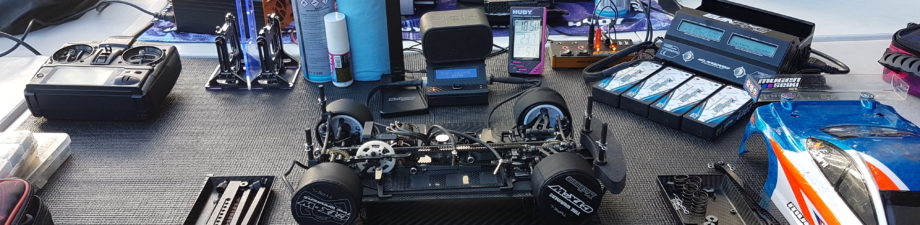
Mi5evo – Schumachers next evolution..
So, this June, Schumacher released an update to their Mi5 platform.. well, update is almost under selling it! Pretty much excepting the drivtrain, bearings and hardware, the car is completely new, with minimal carry over of parts
I’m not going to run through all the changes from old to new, as that’s been covered in plenty of places, and with a good review over on Action R/C, and Schumacher themselves have a great video introduction over on youtube. Instead, with a new car… comes new build tips!
Now the list of the old car was pretty decent, but with the new there really are very few! The quality of the new car has taken a marked improvement, with the fit and finish very nice. The plastics use a new composition, which seems stiffer than before, and the rest of build pretty much falls together.. but there are still a few places that could do with some work.
Parts list
This is the list of parts that I would consider essential to get for the initial build.
- G884 – Front True CVD joint (1pr)
- U4581 – 2.5deg rear arm
- U4605 – Top Deck Stiffener
- U4584 – Emulsion shock rebuild kit
- U4327 – Alloy servo mount (black)
- Tamiya 42137 – TRF competition O-rings (or similar)
Next up is the list of parts that are good to have for tuning of the setup.
- U3833 – Alloy rear driveshafts
- U4563 – 2.5mm top decks
- U4574 – Front roll bar set
- U4575 – Rear roll bar set
- U4601 – Wishbone straps set
- U4609 – 3mm top decks
- U4602 – Steering arm extra lock
And now onto the actual build tips. To keep it easy, I’m going to run through each step from the manual in turn..so here we go!
Step 1
Nothing to report here…
Step 2
So the first thing to recommend is to follow this video, to free up the lower wishbone sockets. Out the packet, the sockets are a bit tight, so freeing them up helps to let the arms drop freely.
Make sure that you follow the instructions when putting the sockets in the arms.. pay attention to the pips!
Also make sure to follow the technique detailed in the manual for doing up the lower balls. Pinch tight with hex driver, then torque down with the spanner.
On the advice of the UK guys, I also run cut wishbones. Basically, you want to remove the inner brace on the wishbone between the mounting points (turning the arm from an A to a V). This allows the arm to flex more, and generates more grip, without losing responsiveness. If you run on super mega high grip tracks/lower powered classes, leaving the brace in place on the rear arms can help to gain steering. Personally however, I’d prefer to tune the setup to get steering (and bare in mind that with the evo Schumacher offer rear arms down to 1.0deg rear toe now), and just run cut arms regardless.
The last thing to mention, is that for some reason, when bolting down the rear arms, the mounts can twist a little, which results in a difference in rear toe from side to side. The only way to solve this, is to use different rear arms, using 0.5 deg less on the left. So for equal 3deg rear toe, RL would be a 2.5, the RR would be a 3.0 (hence the extra arm in the parts list)
Steps 3 – 6
Nothing to report here… Just make sure to keep the bulkhead screws loose in readiness for the transmission jig in Step 7
Step 7
Not so much a build tip, but at this point I added the extra front top deck brace (U4605) to help stiffen the front of the car up more. Found even in low traction that this helps improve the balance of the car on flowing tracks, although on tight and twisty tracks removing the brace can help improve initial steering.
Steps 8 – 12
Again nothing much. Just keep an eye on any potential loctite locations, and make sure to set the lock-stop grub screws flush in Step 11.
Steps 13 – 16
The diff is the same as the Mi5, so the previous diff build guide posted here is still relevant. Although as a small update, I’ve since switched to running the shim setup as detailed in the Mi5evo manual.
Steps 17 – 23
Again, just follow the manual 🙂 Make note of the eccentric adjustments, this is one of the big improvements over the Mi5, with much more refined setting now possible. Schumacher will be offering aluminium eccentrics (U4610 for one pair), and this is something I’ll be fitting when they become available, as plastic can deform slightly and ‘pinch’ bearings. So the alloy holders should help to keep the transmission free.
Step 24
You’ll want to check the freeness of the suspension here (and in Step 29 & 30), and make sure it drops under it’s own weight. If tight, just run a 2.5mm reamer (or even just a drill bit) through the holes in the wishbone end plastics until they free up. Also, don’t crank down too hard on the captive grub screw. It’s only there to stop the pin moving out of the hole, so doesn’t need to be locked down hard.
Steps 25 – 28
Again, just follow the instructions. A bit of grease on the turnbuckle threads really helps a lot in their assembly. Using the alloy rear dogbones (U3833) can save a lot of weight too.
Steps 29 & 30
Same as Step 24, check the suspension can drop under it’s own weight, and if not ream the outer hinge pin holes.
Step 31
Not so much a build tip, but more a general setup thing, is that most setups use between 0.5 – 1.5mm of shiims on top of the steering hub. Worth putting it in now, rather than later 😉
Step 32
Here, I would swap out the standard front driveshafts for the optional Front True CVDs (G884). These are a must have option in my opinion, and make a massive difference to the front end smoothness, especially when using a spool.
Steps 33 – 34
More following of the manual here 😉
Step 35
Now the new car uses new (shorter) shocks, although the internal volume is still the same. The Double O-ring shock guide is still relevant, but some of the details have changed. There is no need to cut the shafts anymore, and ignore trying to put two O-rings in the bottom as they won’t fit!
Step 36
Ditch the kit o-rings, and use some Tamiya TRF competition O-rings (42137) or similar. The kit O-rings are made from a soft rubber, and don’t really hold a good seal. With the replacement O-rings, go with both the shims to help make for a good sealing and smooth shock.
Step 37
Add a 0.1mm shim under the shock piston to help remove piston float.
Step 38
If you want to run vented shocks, run a 1.5mm drill bit through the hole in the top cap. Personally, this is how I prefer to build my shocks, having found vented with zero rebound to be faster at both local tracks. Additionally, by purchasing the Emulsion shock rebuild kit (U4584) you get the M2.5 button heads and sealing washers to allow sealed, vented and emulsion shocks to be assembled.
For the X dimension, set to 11.0mm, this seems to be the go to setting based on recent setups.
Step 39
Just make sure to use oil to get the o-ring thread working. Also note there is a recess in the top of the adjustment collar. This allows for longer springs (like Yokomo’s) to fit, and still get ride height.
Step 40 & 41
Here, before assembling check that the front and rear bars are flat, I found my rear bar to be about 3mm out left to right! If not, try and bend them to at least close, and then adjust the links to suit.
Step 42
When mounting up the drop links, make sure that they are at 90° to the arm as the manual says. Otherwise, they can bind up the suspension and limit up travel. On the front links, I’d also recommend increasing the size of the scalopped out section of the ball joint, just to make sure clearance isn’t an issue.
For setting up roll bars, follow this guide.
Step 43 & 44
Nothing to report..
Step 45
For the front body post setting, having the post set on the tenth mark is spot on for an LTC bodyshell, and then put a foam shim in for a Speed6. The new double holes on top help here. The Speed6 needs a higher front mounting than the LTC, and I always prefer to adjust the front mount rather than lower the rear. (Adding or removing a foam shim also allows quick practise shell changes)
Step 46
On the rear, bodyposts set to halfway between the 7 and 8 marks is fine for both the LTC and Speed6
Step 47
An alloy servo horn is recommended, it’s stiffer and more responsive than the plastic horn. Although my kit did come with an Impact servo saver in the box, which is a good choice if you want to run a saver.
Step 48
Not a build tip, but another optional part. U4585 is the Pro Carbon servo mount. Use a single (rearward) mounting point.. and looks cooler than the kit part! :p I also use the alloy servo mounts (U4327), as I find that the kit plastic ones flex a little, and want the servo mount to be a solid as possible.
Step 49
Just add a little greese for the turnbuckles.
Step 50
Instead of adding the foam pad to the outer hooks, put it on the supports in the middle of the car. This way the pads don’t get knocked off when you put the battery in ;).
Step 51 & 52
And we’re done! Overall, a pretty simple build really…
Hopeffuly the guide is useful, feel free to leave comments and feedback, and enjoy your evo! 😀