Hobbywing V10 Motor
I recently received an updated version of the Hobbywing V10 motor to run, so I thought I would do a bit of a review to show the features.
(Note; Excuse the dirt… I was too keen to run the motor before doing this review 😉 )
Build and Construction
Given I predominately race modified, I was sent a 4.5t version to test out. As you can seen, the overall look of the motor is very clean, with the can anodised black, with small polished silver highlights on the ends. All the markings are laser engraved, and clearly denote the motor and type. However, the markings do get hidden a little by wires when mounted in a touring car, but that’s no biggie.
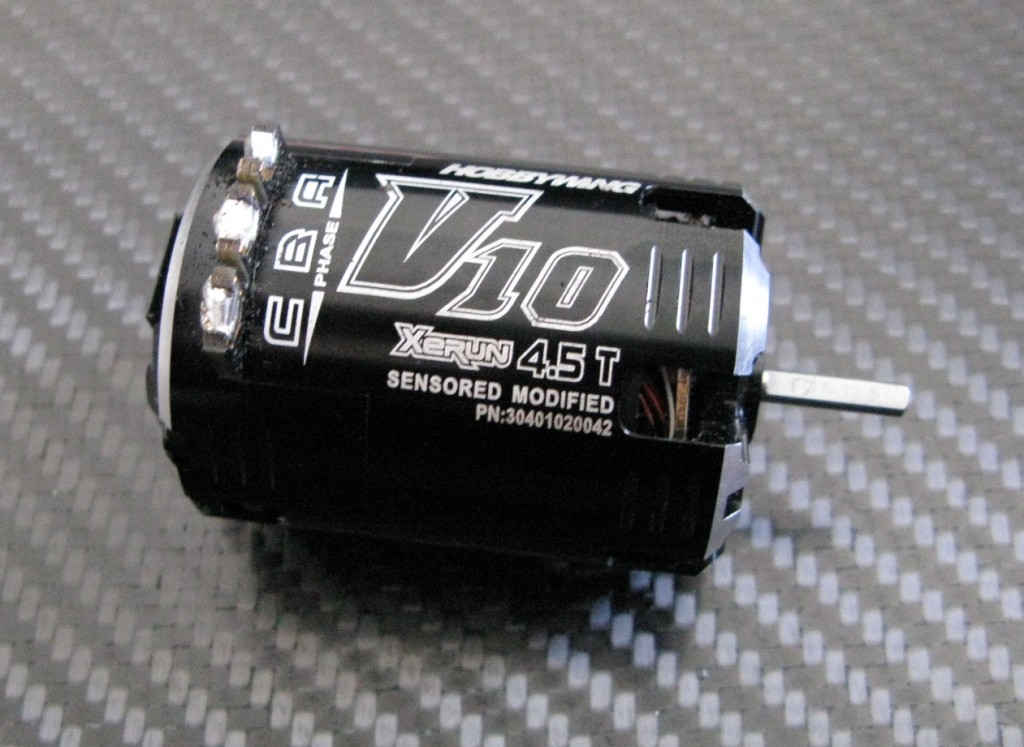
V10 Motor
The V10’s are all built to meet the worldwide motor standards, such as ROAR and BRCA rules. This includes the requirement of being able to measure the stator size without dissembling the motor, and having the stator clearly marked with the wind.

Stator marking
With the motor disassembled, it’s all fairly standard construction fair, with three long screws holding on the rear casing, and two screws for the timing plate. Thankfully all the screw use a 2mm hex, so no need to use multiple tools to take it apart. The fit and finish feels really good, and the materials all seem of high quality.

Disassembled
Looking at the sensor board, everything appears securely mounted, with the rear bearing held in-situ, keeping the rotor in a good position in relation to the sensors.
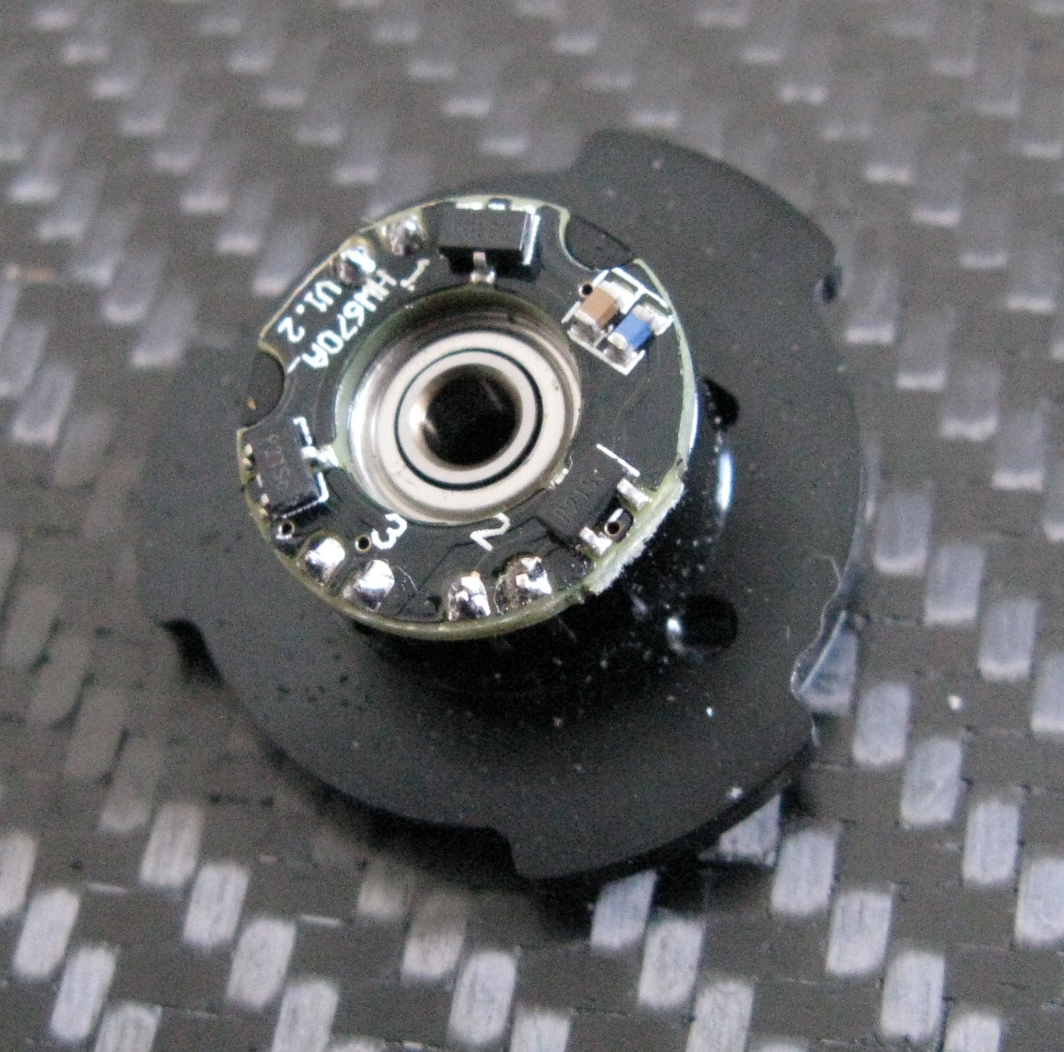
Sensor board
The sensor port exits vertically out the top of the motor. I personally prefer this type of mounting, as it means that the sensor is less likely to get knocked, and also keeps the cable as far away from the ground as possible!
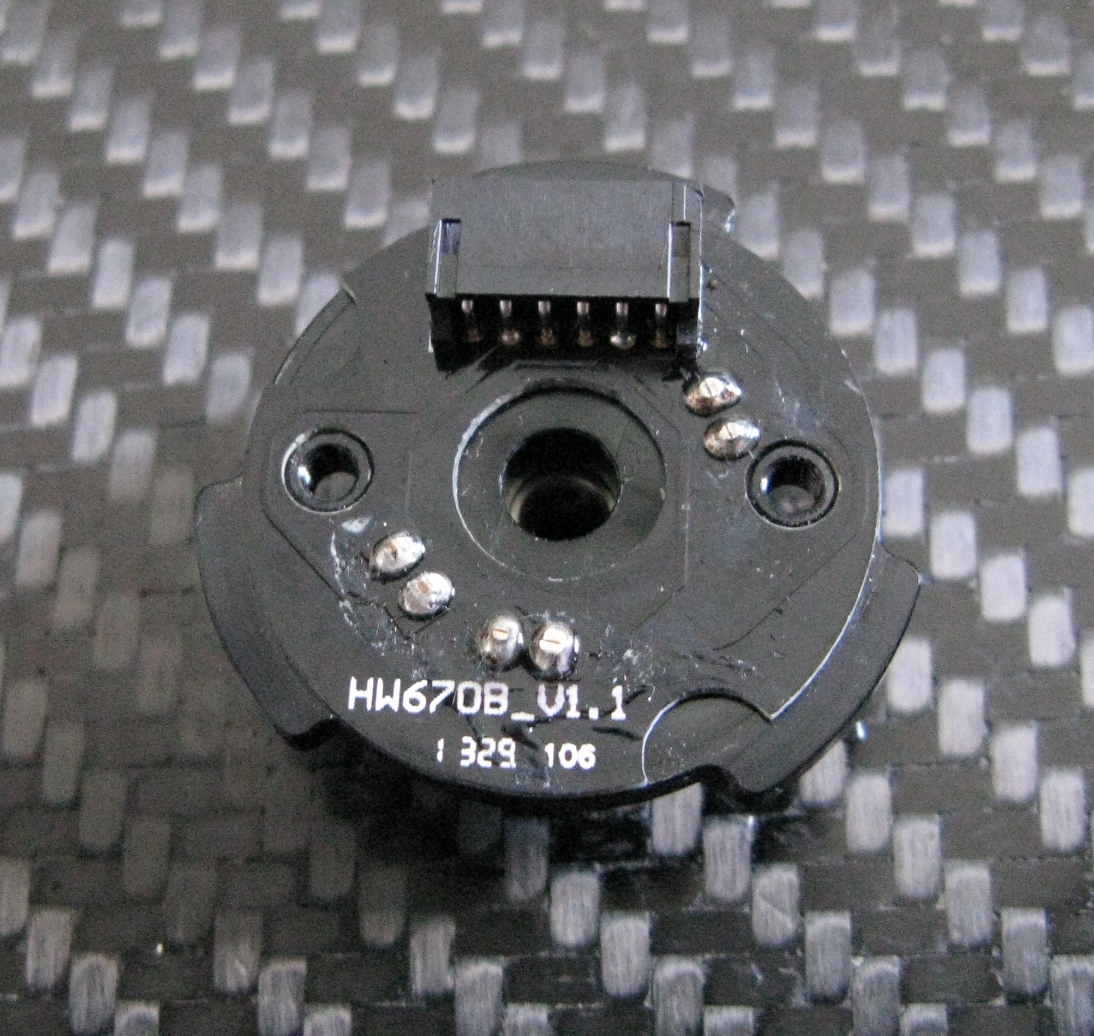
Sensor Port
The timing plate is one of the other revised parts on the motor. It’s now made from black anodised aluminium, with a laser etched Hobbywing logo. It should have no issues with holding the timing setting, unlike the previous plastic versions.
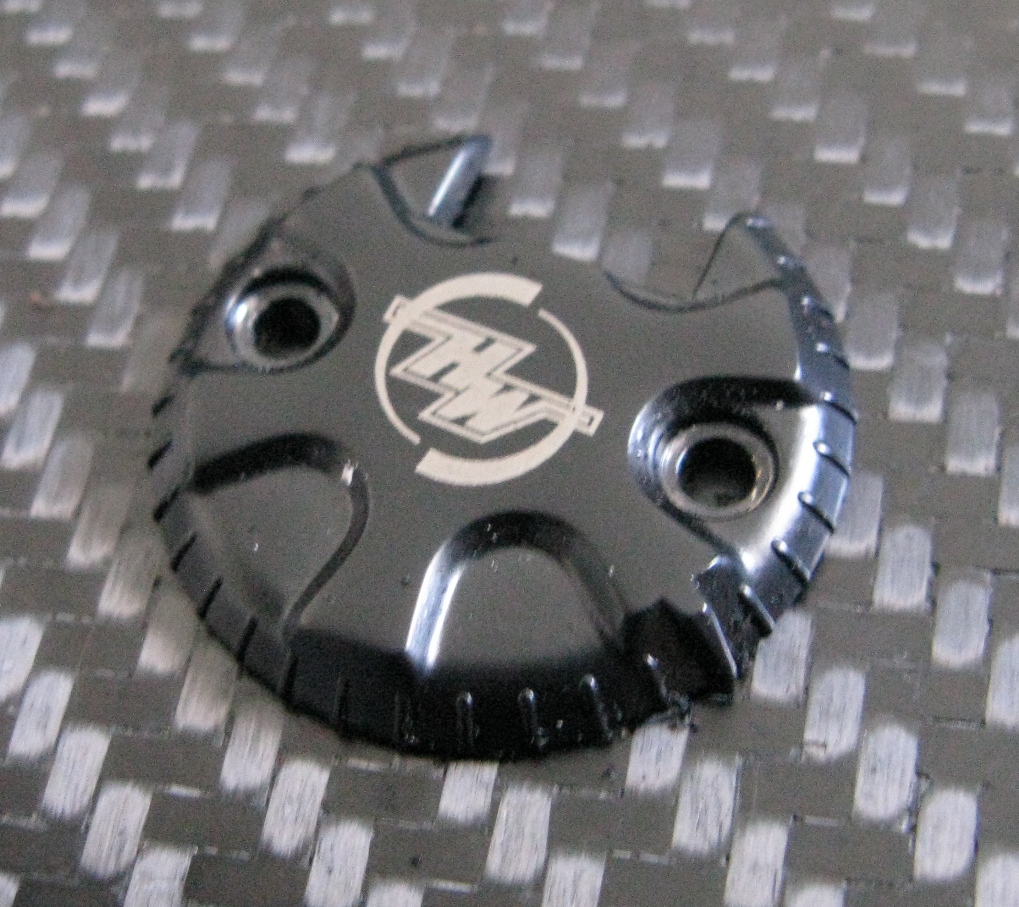
Timing Plate
The end casing is clearly marked from 20 – 50° of timing, with 30° being the factory setting.
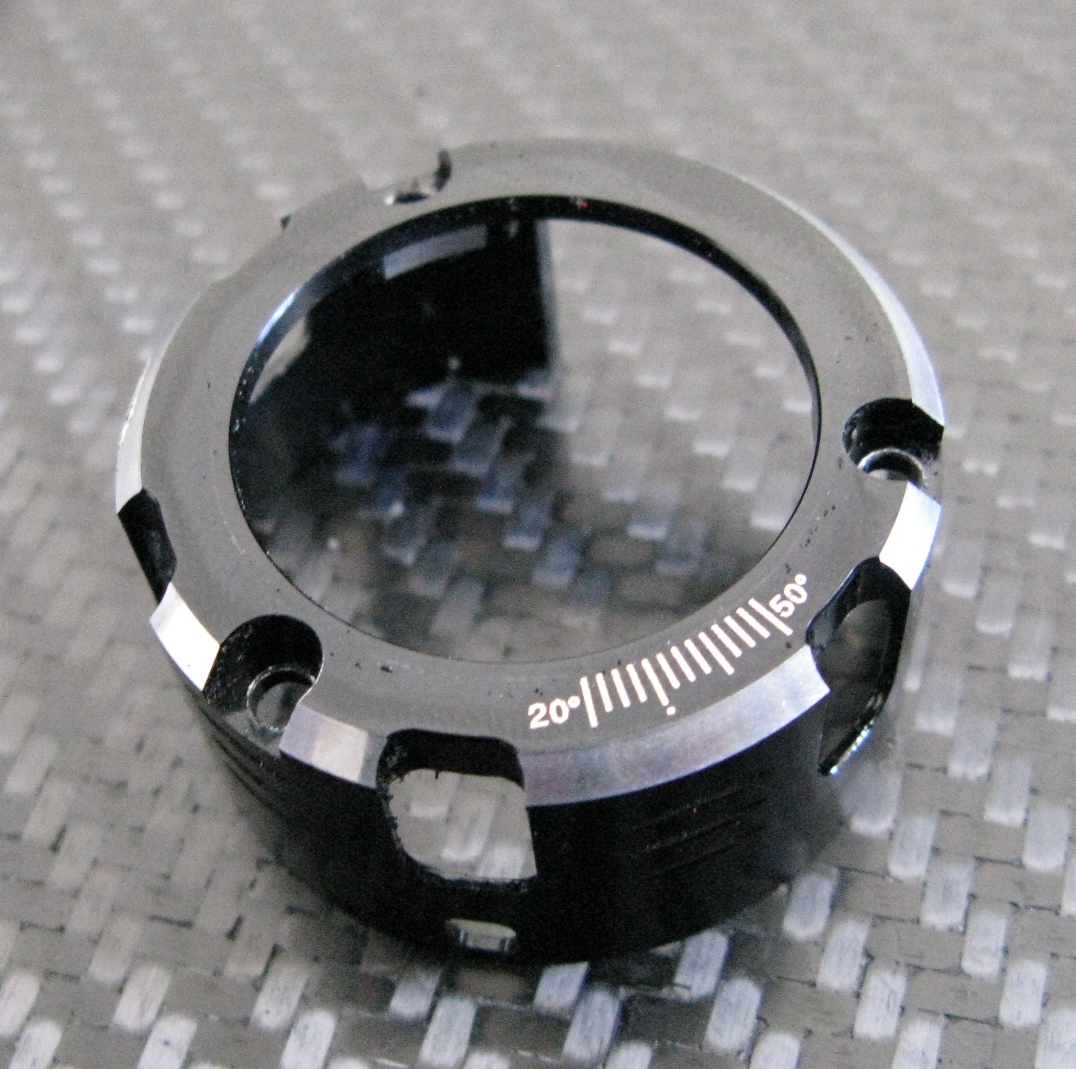
Endbell
The standard rotor, in this motor at least, is a 12.5mm outer diameter, with a 5mm diameter inner core (this gives a “thick” magnet). The rotor also has a small integral fan mounted.
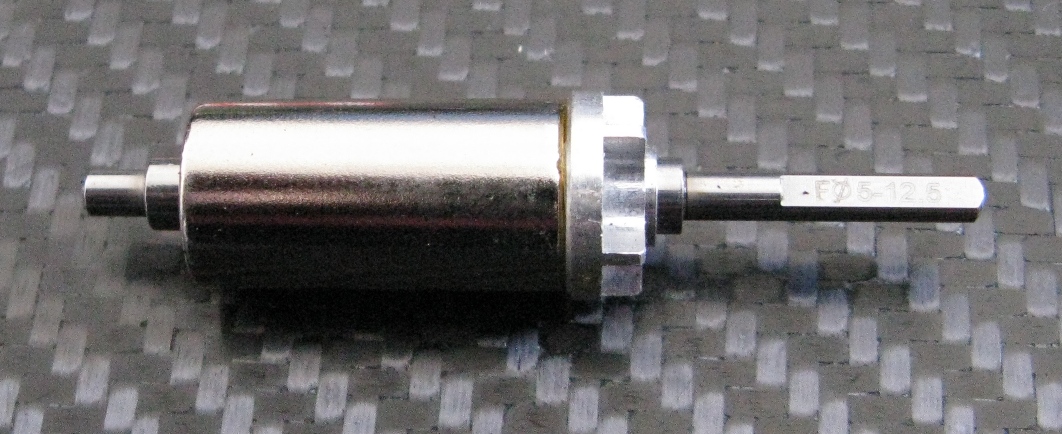
Rotor
All the rotor details are clearly etched onto the shaft of the rotor, even with an F indicating the fan. Hobbywing offer a range of different rotors, in 13.0 and 13.5 outer diameters, 5 and 7mm inner cores (thick and thin magnets), and with and without fans! In total there are 8 different rotor options available.
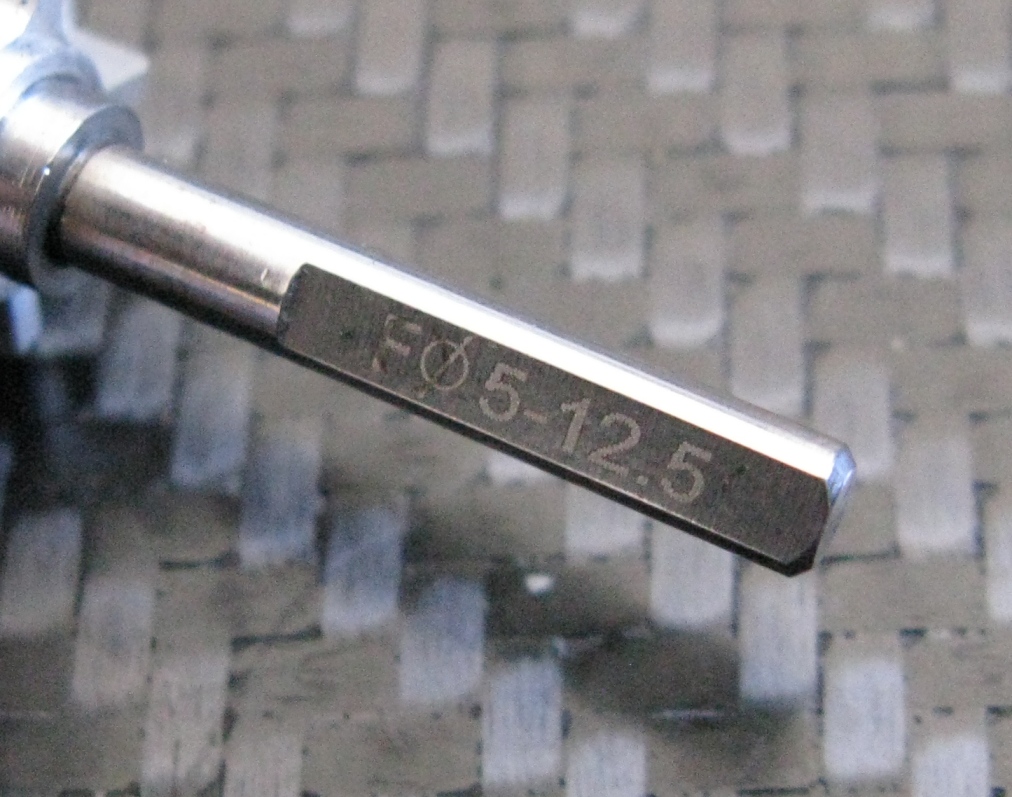
F (for Fan), dia5 for 5mm inner core, and 12.5 for outer size
Track Test
So that’s all the main details of the motor, but the main question is… how does it run? To find out, I mounted it up in my Mi5, along with my usual Hobywing V3 speedo’s. Everything else I left as normal from running my previous MuchMore motor, geared at 7.9.

Ready to go – looks good in all black 😉
First thing I noticed more than anything else, was just how quiet the motor was. Actually made it quite hard to hear the motor to check the gearing, but did give the impression of a very smooth feel on track. Punch and top speed were very good. However most noticeable was that the brakes were very strong, too strong infact, as I struggled to keep the car flowing. It was almost like there was too much brake initially, with the a not very smooth feel.
I tried a couple of different ESC and radio settings to adjust the brake feel, but still couldn’t get it how I liked. So a quick message to Factory Hobbywing driver Andy Moore saw a suggestion to drop the brake punch down from the usual 20/20 that I was running. Going to 12/15 on the ESC for these settings straight away made the brakes smoother and more linear in feel, whilst also meaning I could bring the drag brake back up.
In terms of temperature, with a 40mm WTF fan fitted, the motor was still only coming off the track after 6minutes at 60°C, which is really cool! Motor took these temperatures all night long, and never skipped a beat (with the exception of the few laps where I accidently unplugged the sensor cable, oops!)
Overall though, very pleased with the motor, very smooth on the throttle, but good top speed, and really mega brakes too (almost too much!). And it runs cool too boot! Can’t really go wrong with any of that.
Setting Sheet