Building a TRF419 diff
So it’s been a while since the 419 has been out, and seeing as one of the more popular questions on the car is “how do I stop the diff leaking?”, I thought it was about time to offer some advice on the matter. So here it goes!
[UPDATE – I’ve added some info on things to look out for when checking the diffs… still need to come back later and add some photo’s of the build stages]
1) First up, the parts you’ll want to get hold of;
- Xray 972050 – Silicone O-Ring 5×2 (10)
- 8x5mm rubber sealed ball bearings
I’d also advise get hold of some Associated Green slime, which is always handy. The reason for the Xray O-rings is very simple. They are a very soft silicone, and as such seal very well, but without binding… this point I’ll come back to 😉
2) So the first step of the build is fairly simple. Take some fine grit paper (400 is fine), and lightly sand the big side of the diff case where the gasket goes. This just helps to remove any high spots on the casing, helping it to seal better on the gasket.
3) Take two of the Xray O-rings and the Paper gasket and smear Green slime all over them. Best way to do this is to squeeze a dollop into a plastic bag, put the parts in, then smear the slime all over. Put to one side for later
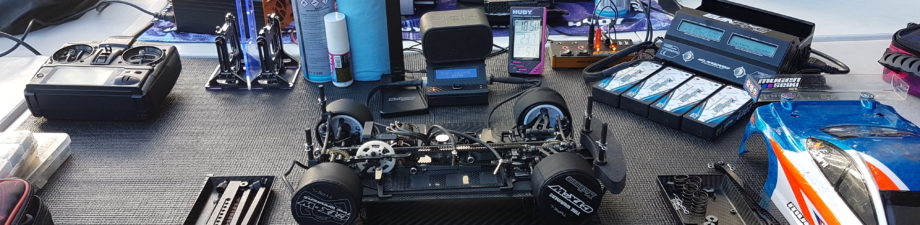
4) Now grab the outdrives, slide over a rubber sealed bearing on each, then slot them into the both case halves.
5) Grab the xray O-rings, and slide them over the outdrive from the inside. They will be a little tricky to get into the recess, as they are a bit bigger than the Tamiya ones, but you can use the diff shims to help here.
6) Slot over a 0.2mm shim behind the large diff gear, and slide the pins in. Basically remove 0.1mm of shims from the kit setting, which helps to take into account the slightly larger size.
7) Next up, cut the gears of the sprues. Do this so you remove any remnants of the sprue legs. You can lightly sand the back of the gears if required. 400 again is enough here. Slide over the outdrive, and into place.
8) Now assembly the pinion gears as per the manual, and place into the big case.
9) Fill up the diff with the required oil. My personal range currently is from 2000-5000… although I need to try heavier (7000+). Using the weighing method… 1.5-1.7g seems good. Otherwise I fill to just under the top of the pinion gears, like the manual says!
10) Finally, grab the greased up gasket, and then close the diff up. DON’T FORGET THE ALINGNMENT! Take care to not over tighten the screws, you don’t want to strip out the case. Nip tight, then a quarter turn more is fine.
And with that, you should have a really smooth, and leak free diff!
The following photos I took during the recent MuchMore Masters event (10runs in 13.5t Blinky), and the following two practise days at SMA (14runs in mod)….

Midway though MuchMore Masters – Right

Midway though MuchMore Masters – Left
18 runs and looking good!
24 runs, maybe time for an oil refresh, but there is plenty in there!
Looks pretty good if you ask me!
Why is my diff not smooth? Things to look for
So, having been trying tonight to nail down why one of my diffs doesn’t feel the same as the others, even when dry, thought it would be a good idea to add in things to be aware of when building a good diff.
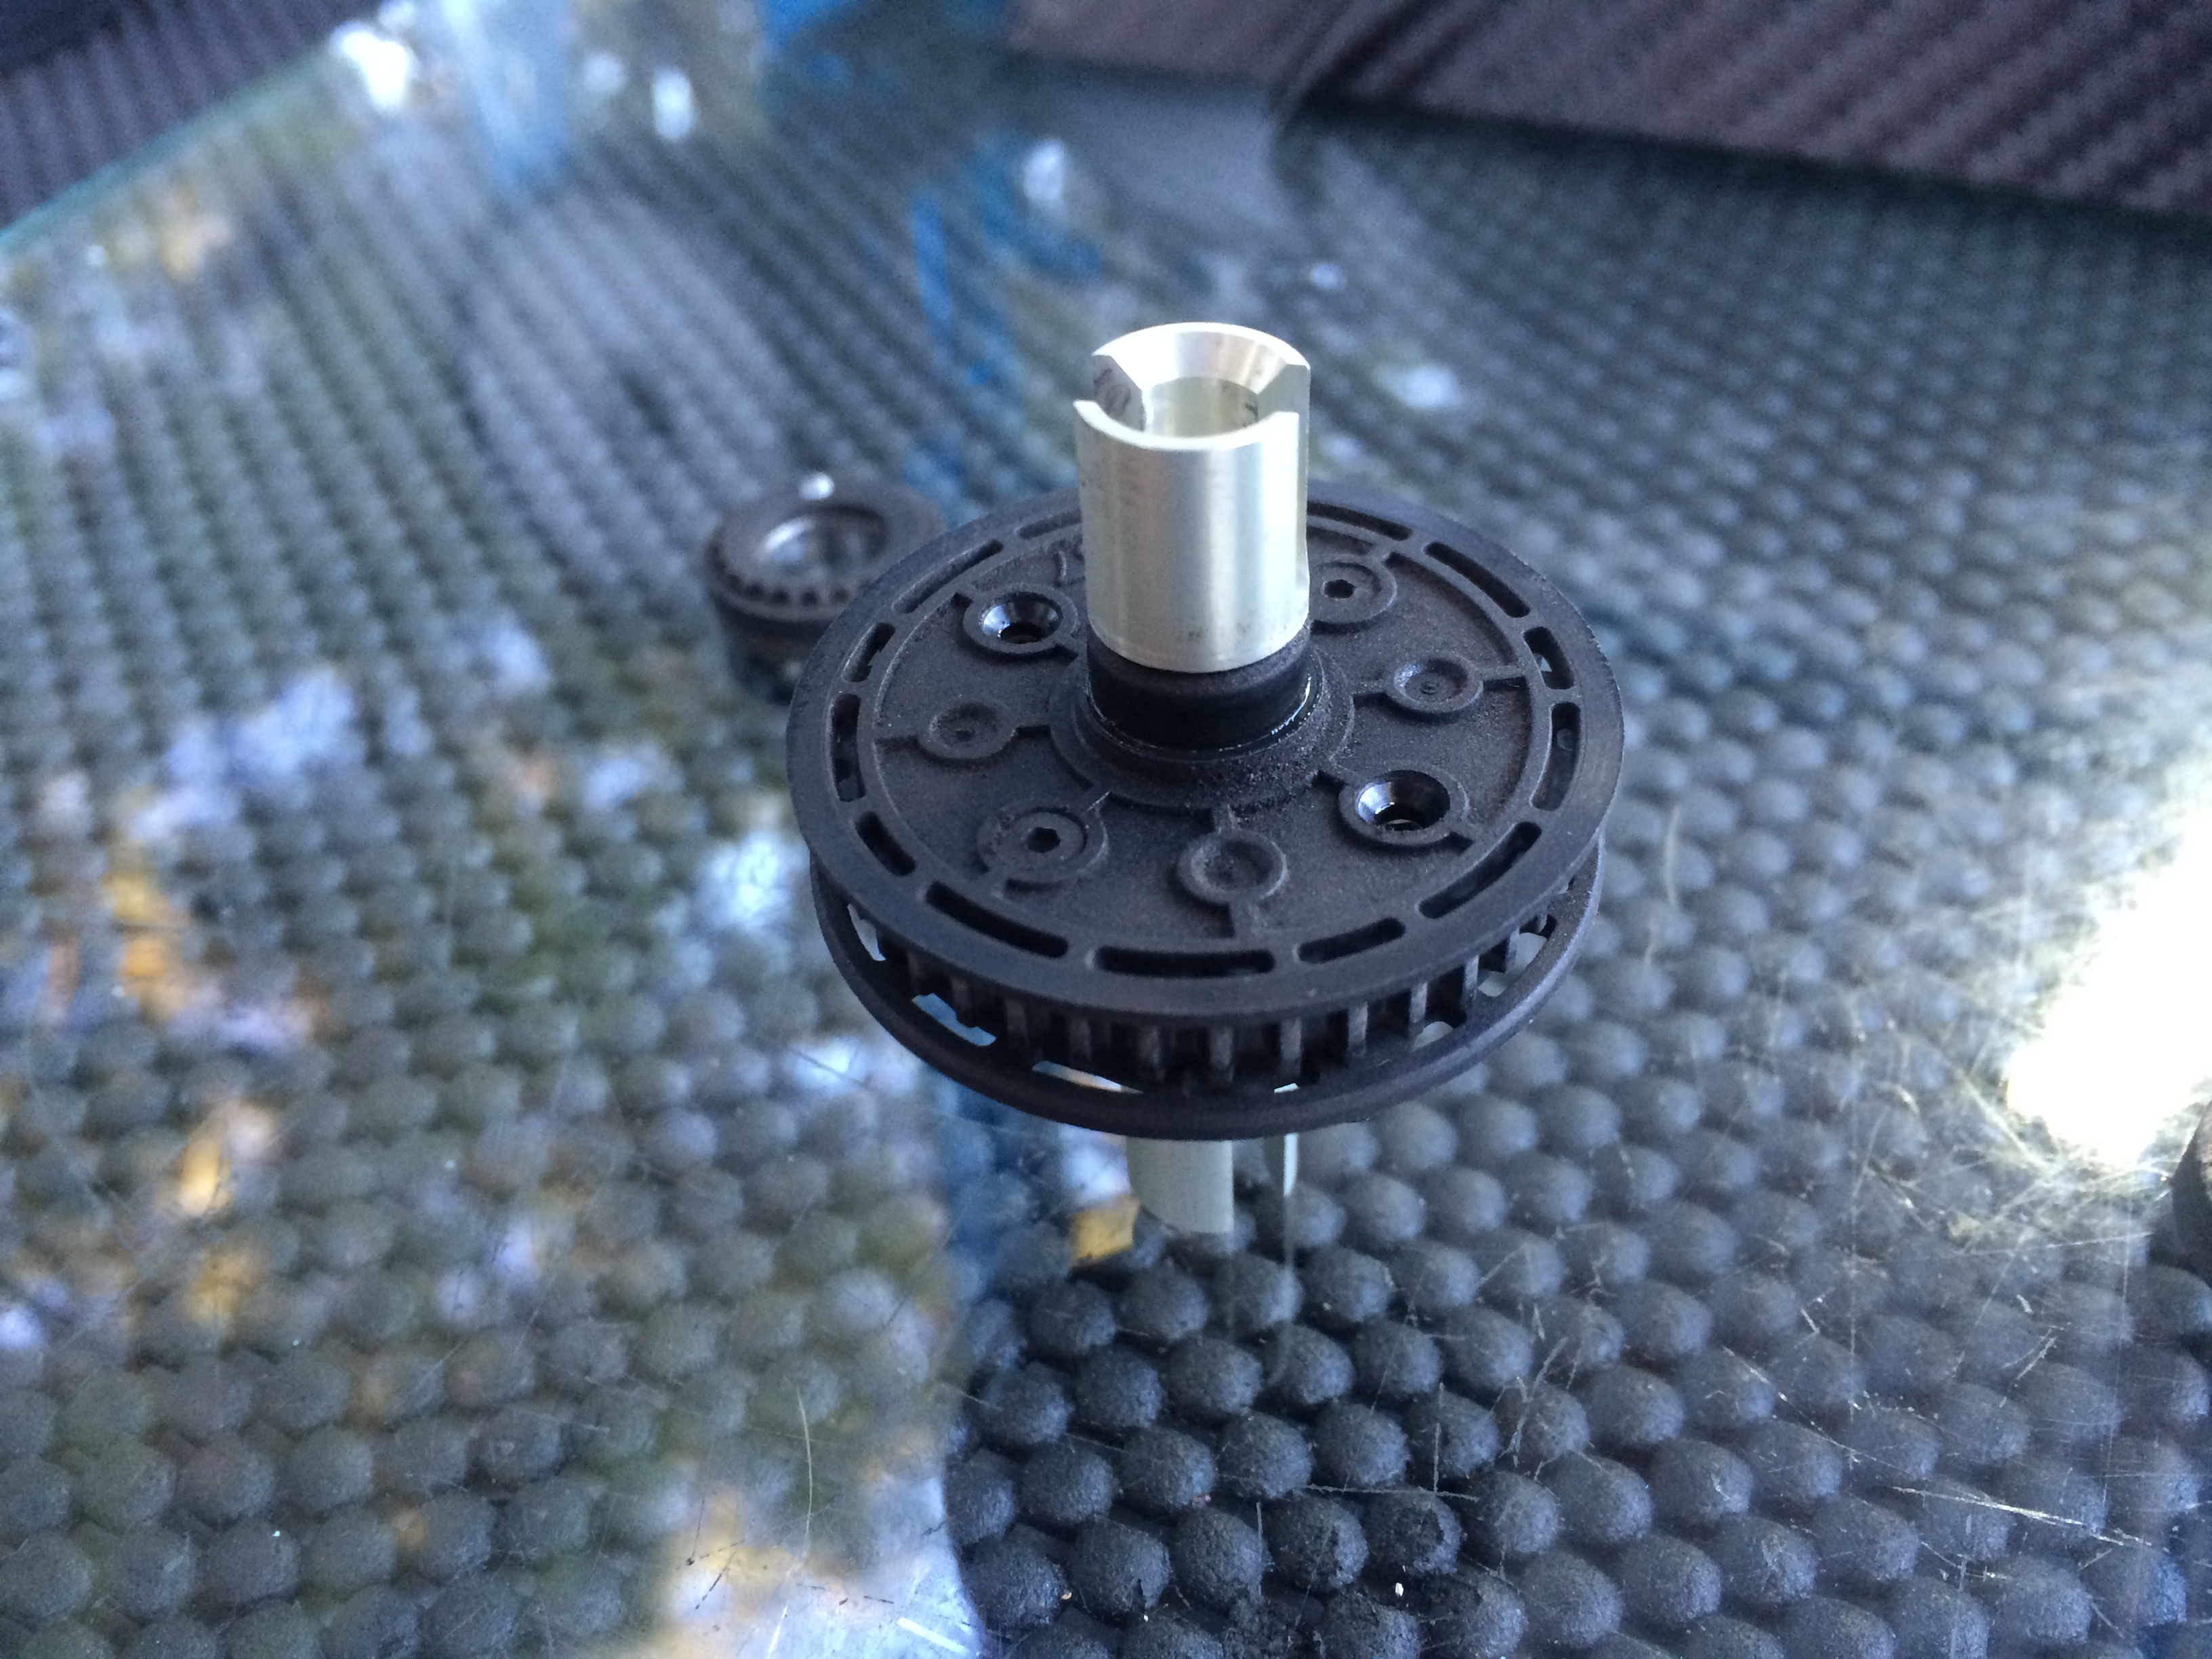
Firstly, the gears. Normally, there isn’t any need to sand the back of the gears prior to putting them into the diff. However, with the relatively small pin size used, the pin hole on the back face of the big gear can start to flog out. It should be easy to spot when this happens, and the diff will start to feel a little tighter. Either replace the gears, or carefully with a sharp blade trim back the raised parts. Out of the packet, the big gears have a thickness of 4.52mm… so you’ll want to make sure they are all in this range. (For example tonight, one of my big gears had flogged, and the thickness was up to 4.67mm).
Also make sure to trim back any flashing left on the gears after you break them off the sprues. I prefer to snap them off, then put an angled cut on the gear itself to remove the remaining material. Doing it at an angle cleans it off the sides and base of the gear in one hit 😉
Next, is shims. I’m not a fan of the smaller diameter shims the diffs come with, mainly as they seem to cone easier than big ones, and there is not a lot of shim resting on the casing. I had some bigger diameter ones from my Schumacher diffs that I’ve used instead, and they pretty much sit under the whole of the big gear. I also don’t like to see a lot of scratching on the surface of the shims… if they look worn, junk them and replace.. smooth is best!
Note, if you do strip out a gear, and the shim ‘cones’, it can also start to bevel the edge of the o-ring hole… this has happened on one of my cases, and regardless of what I do, can’t quite get it too feel the same as the others… new case time!
And thats all for now.